
Soil moisture sensor
!!This article is out of date. Use that Analog sensor board or at least that one A2Dto be able to connect analog sensors!!
Here is my solution for soil moisture sensor and OpenSprinkler 3.0AC/3.2AC/OSPI. I don't see a solution for the DC versions at the moment, unless you use your own power supply for the threshold switch.
Note: For OSPI there is an alternative solution via the PCF8591T 8-bit ADC converter, coming soon.
So you need: Humidity sensor, threshold switch, Power supply, OpenSprinkler 3.0/3.2, Housing, Cable
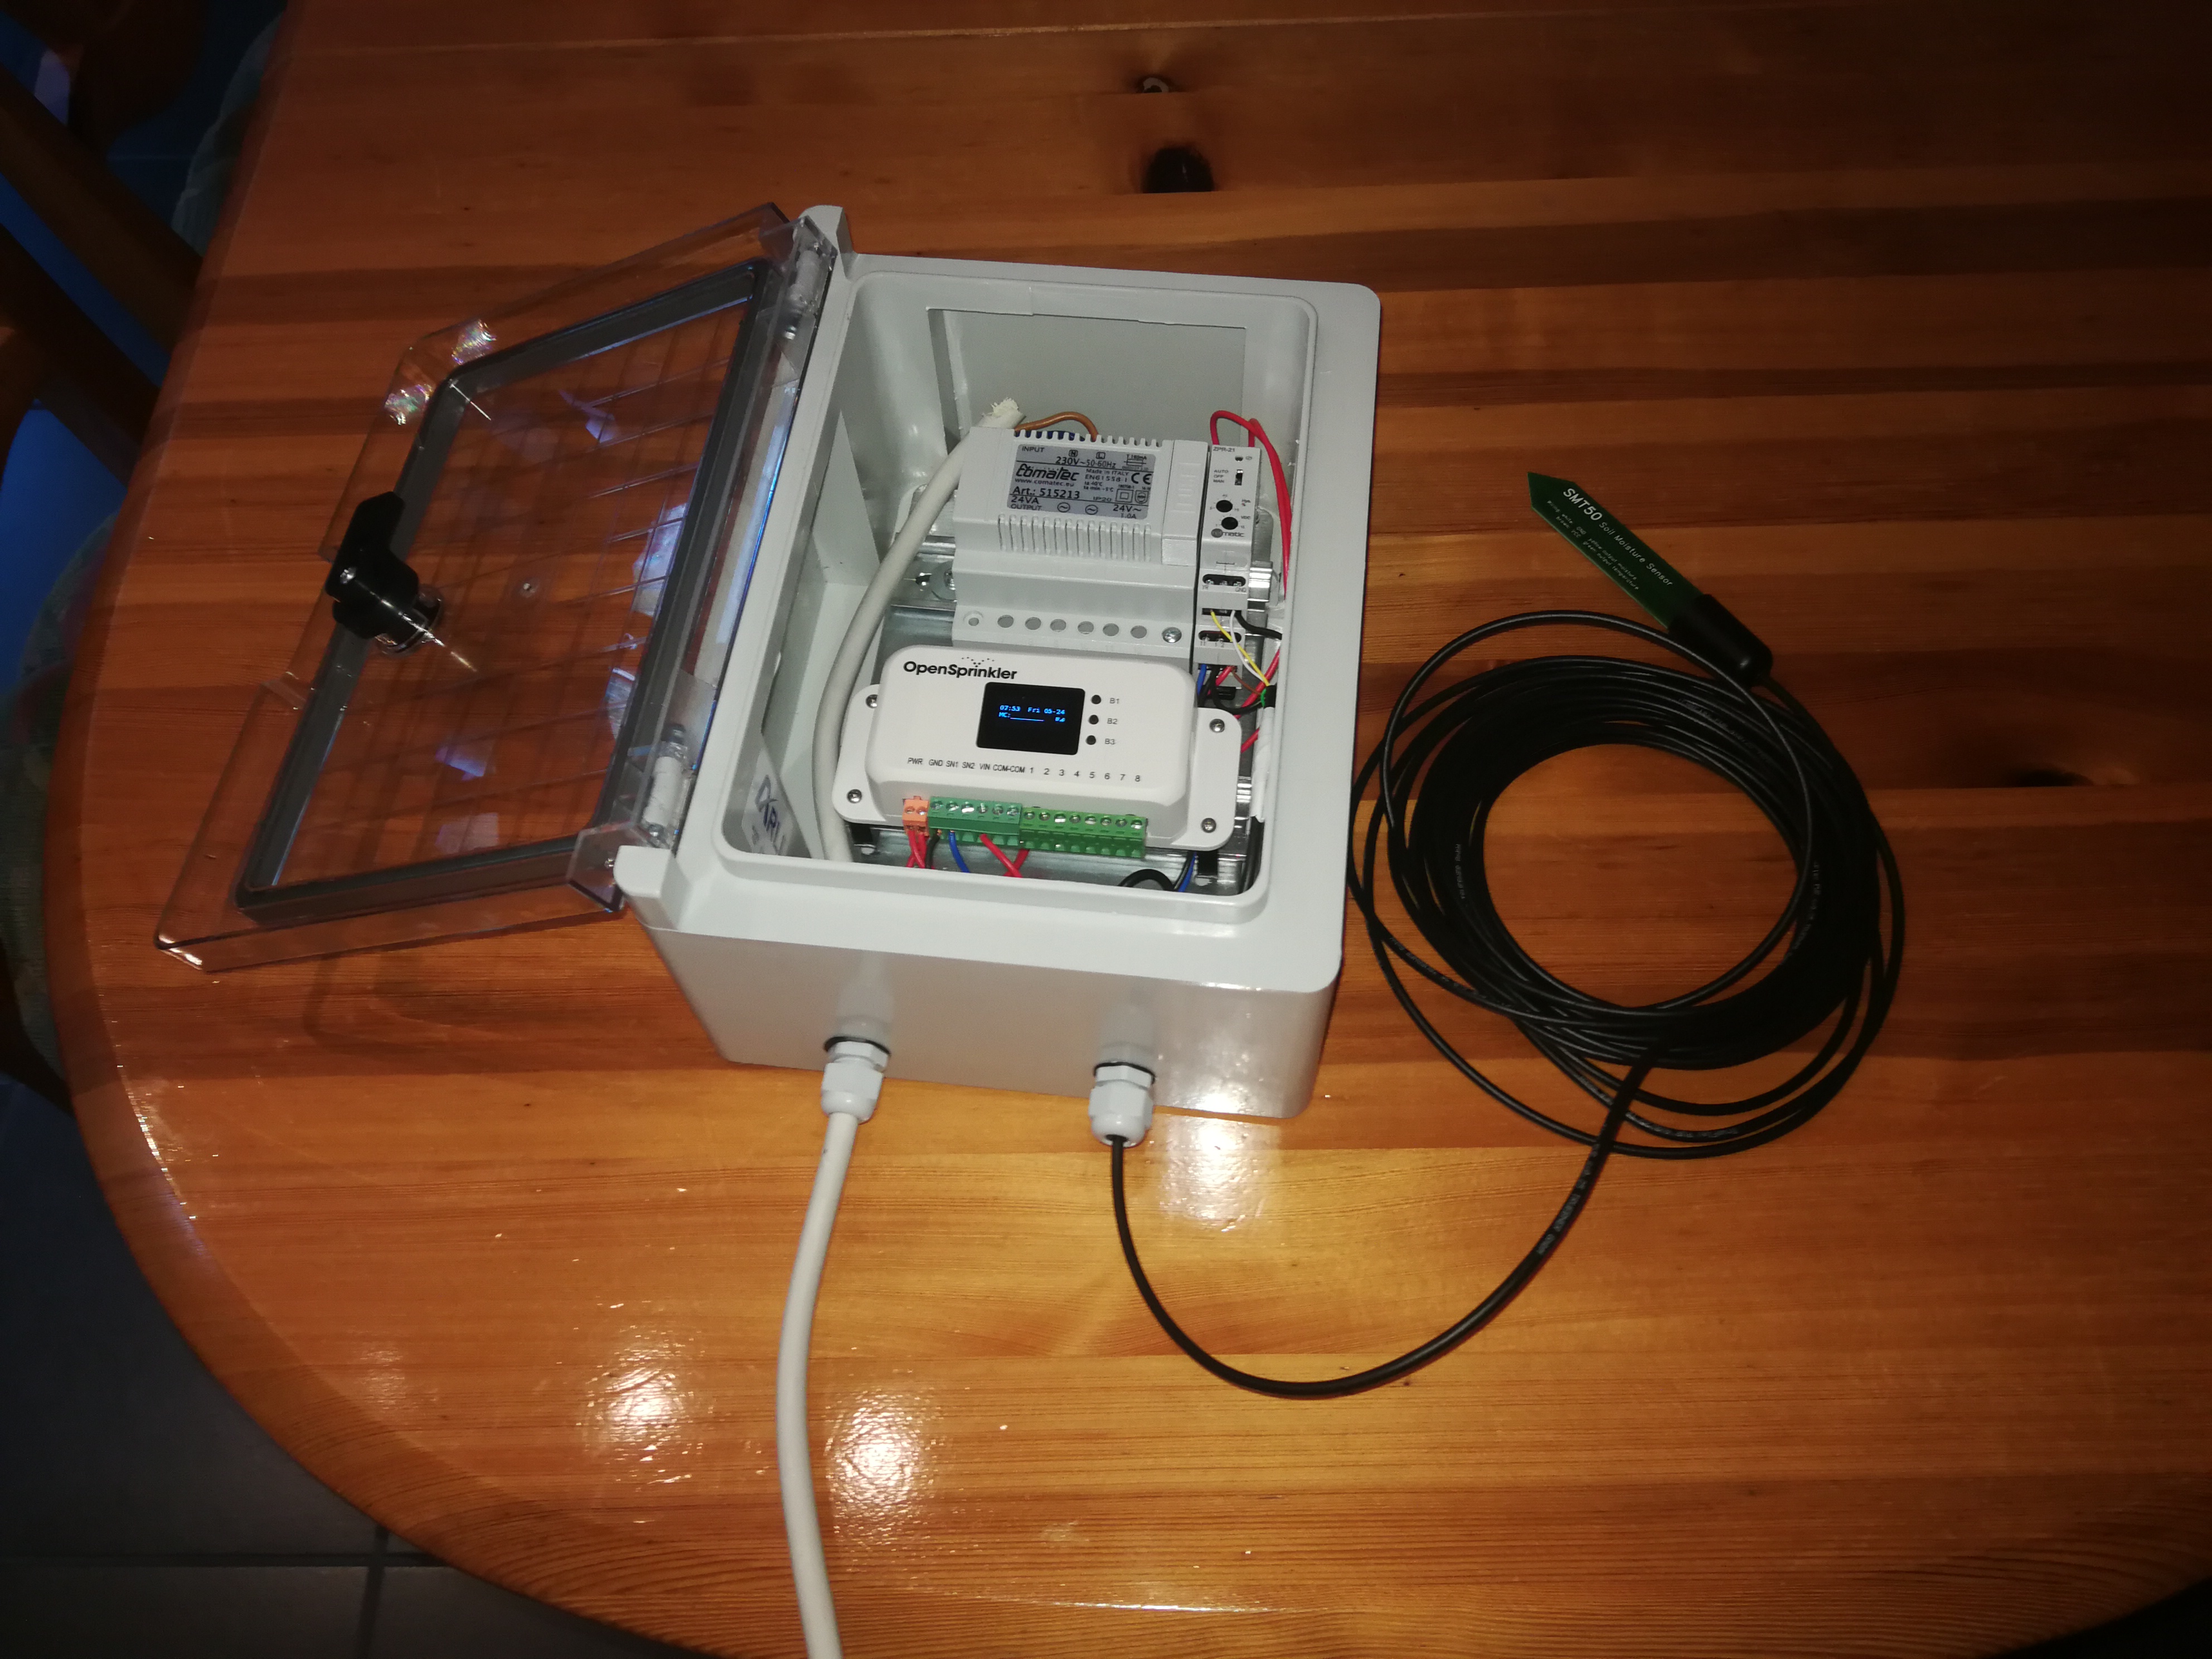
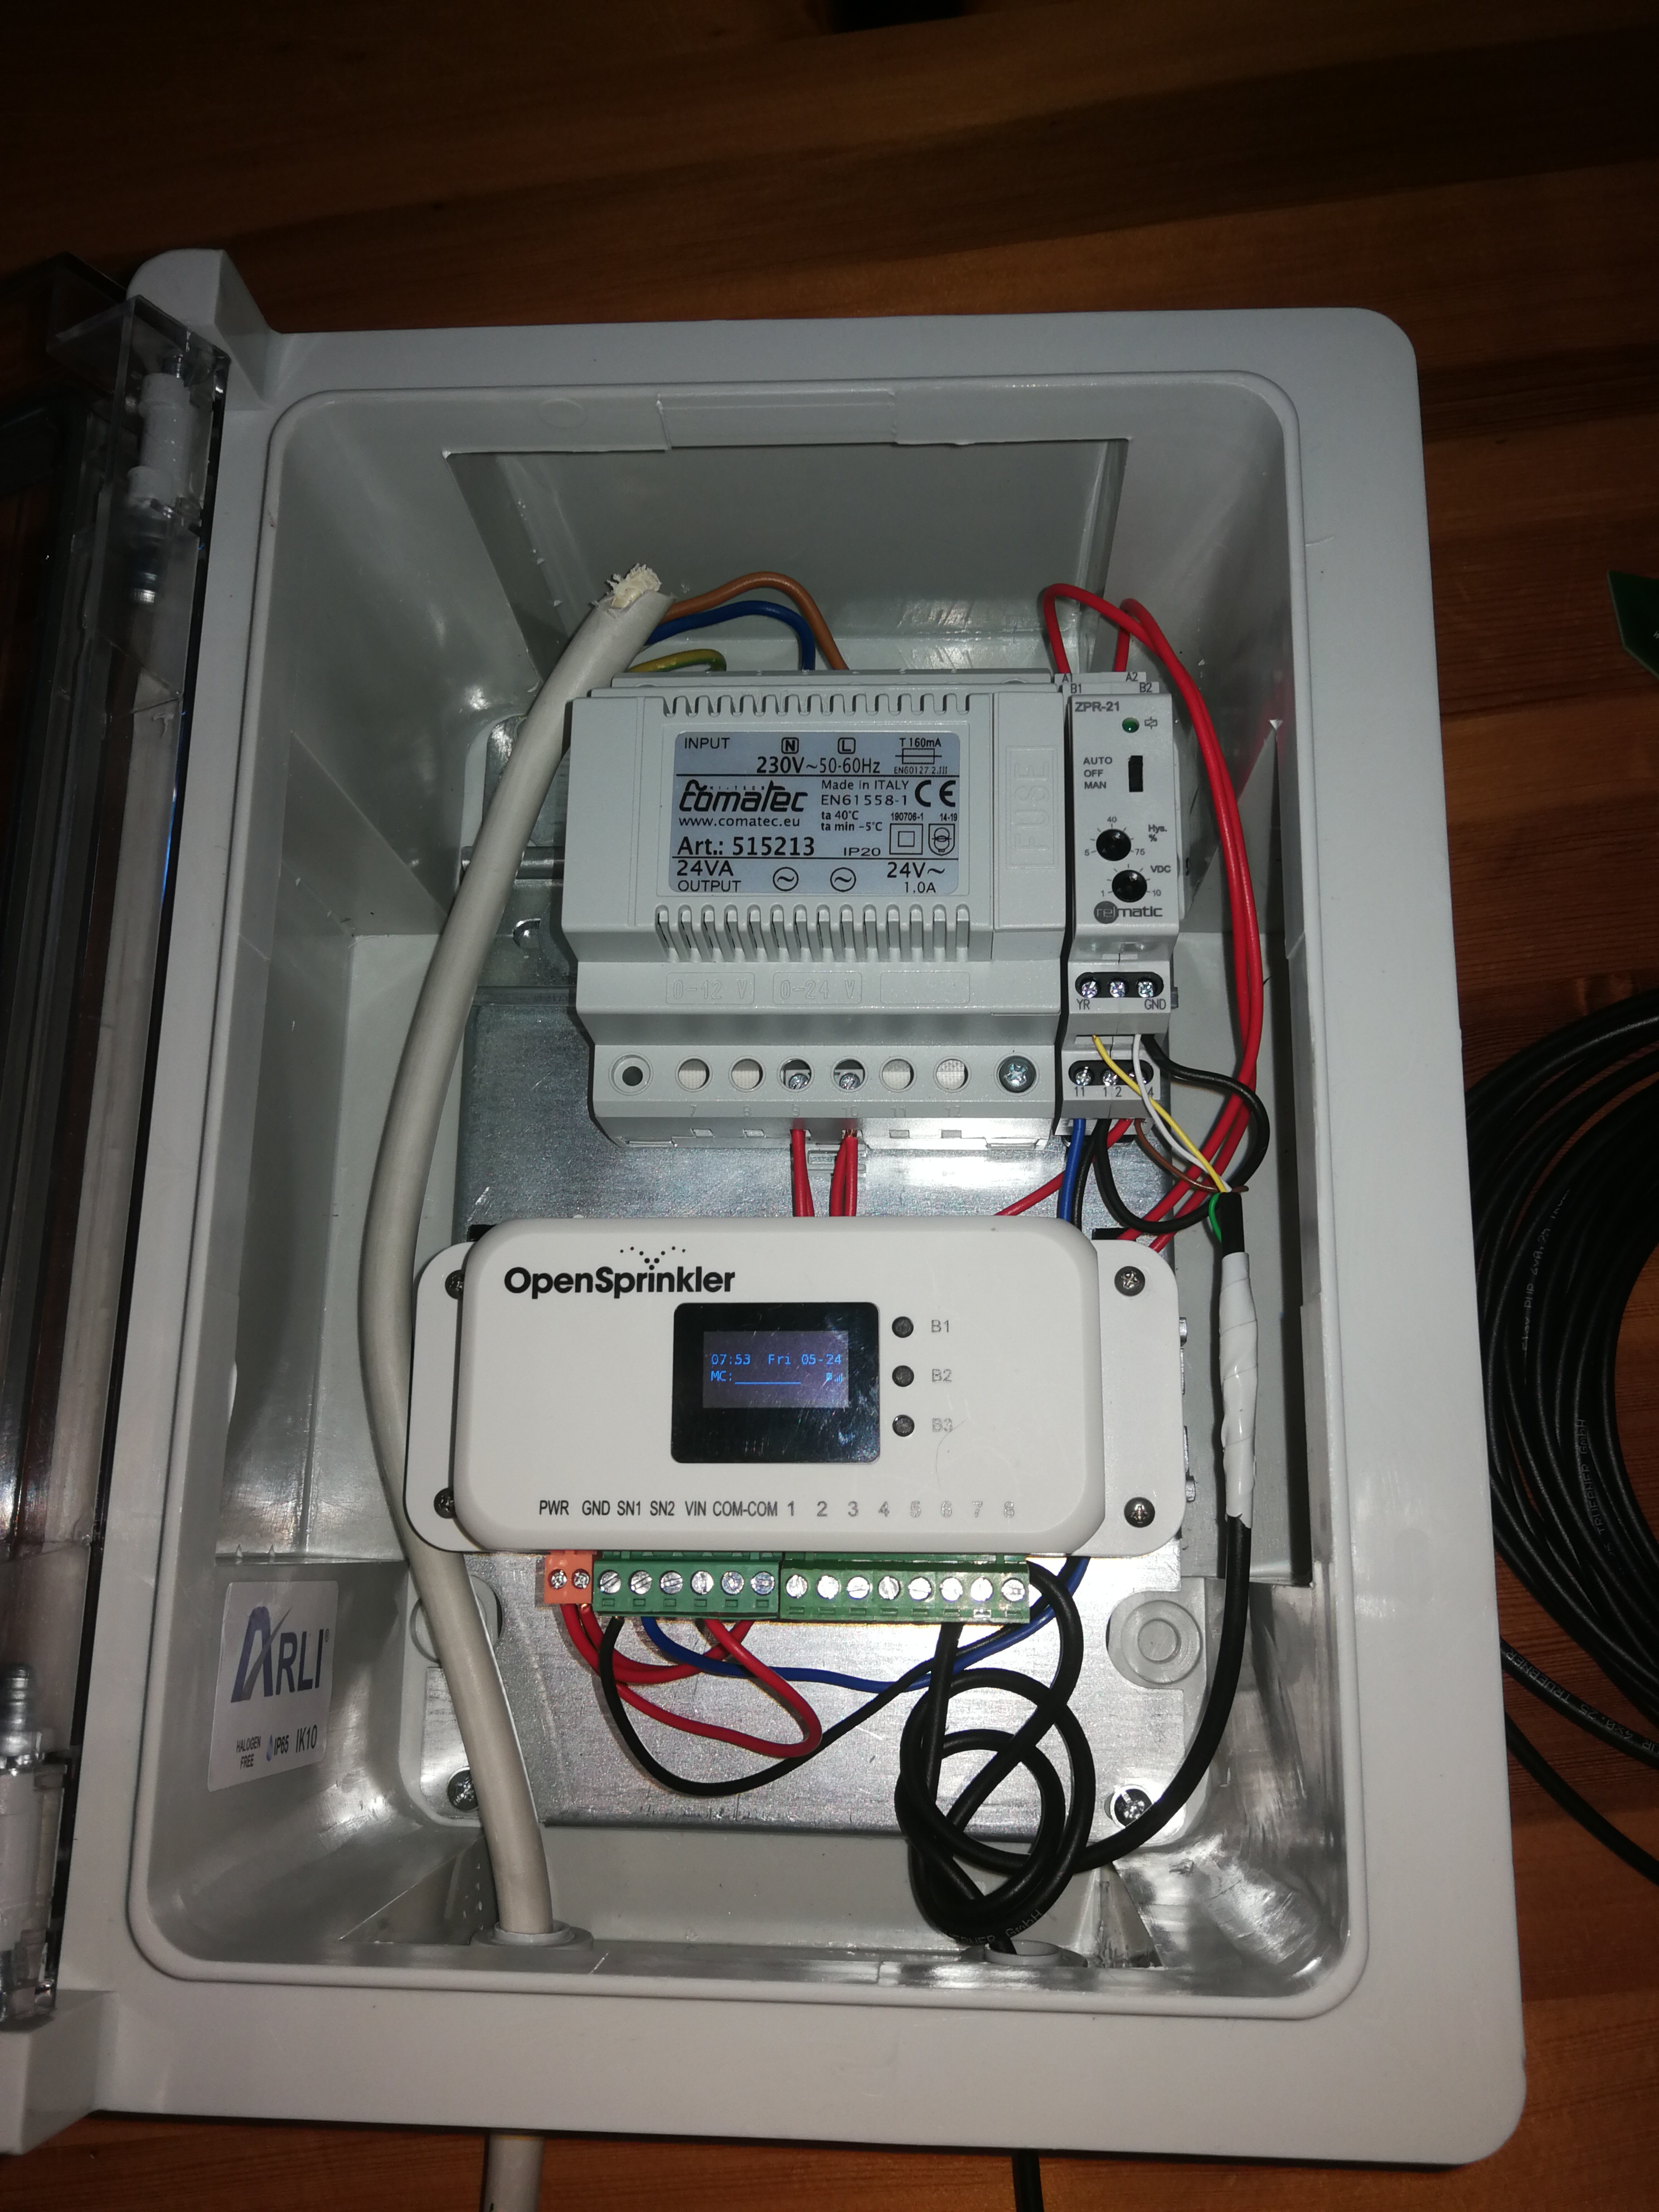
- The threshold switch is supplied with 24VAC power via the power supply (A1+A2)
- The humidity sensor is powered by the OpenSprinkler 5V VIN output (VIN+GND to the humidity sensor)
- The signal cable of the humidity sensor (yellow) goes to the threshold switch input.
- Switching takes place on 11/12/14: If the voltage at YR of the humidity switch is above the set value, 11-14 is switched, otherwise 11-12.
- 12 is GND and 14 is VIN. 11 is SN1
- Now use a screwdriver to turn the threshold switch Hys% to 5 (to the left to stop) and VDC to 1 (to the left to stop). Now adjust the humidity circuit starting from here.
- The LED on the threshold switch lights up when moisture is detected and goes out when it is dry. “Rain detected” then appears in the OpenSprinkler app and running programs (except those with “Ignore rain”) are interrupted.
Wiring diagram:
OpenSprinkler Humidity Sensor Switch Plan
Further links:
Connection of a wireless sensor: https://rayshobby.net/wordpress/reverse-engineer-a-cheap-wireless-soil-moisture-sensor/
Information about the OSPI PCF8591T 8-bit ADC converter: https://rayshobby.net/wordpress/announcing-OpenSprinkler-pi-v1-2/
General functionality of capacitive sensors: https://de.wikipedia.org/wiki/Kapazitiver_Sensor#Feuchtigkeitsmesser
Edit January 23, 2021:
With the A2D adapter, a threshold switch is no longer necessary. The value can be set directly with the potentiometer.
Edit June 5, 2019:
Looks pretty good, the lowest setting of the threshold switch fits quite well. However, we probably still need to make some adjustments to the software:
- OpenSprinkler 3.0/3.2 actually only has one connection for a rain sensor. This is intended if it rains, then no watering or interruption of an ongoing watering.
- However, a moisture sensor triggers while you are watering. This leads to the watering being interrupted because the sensor has simply become wet. But what if it started to rain at the same time? The sensor cannot know whether the moisture is rain or irrigation!
- Likewise, the weather report is trusted more than the humidity sensor. If the weather report says it has rained but the humidity sensor says everything is dry, irrigation will stop. But the solution is simple, there is the option “Ignore rain”, then the humidity sensor is trusted.
So we now need a solution to the problem of the humidity sensor triggering.
Edit June 30, 2019:
I have started developing improved software. I also activated the second input right away. Problem: The app development is lagging behind or cannot show me the options. I'm working on a solution...
Edit September 1, 2019:
Software is now in test mode. Version 2.1.9 now supports BOTH sensor inputs and there is also support for humidity sensors.
Edit September 15, 2019:
Instructions for setting:
- Set Hys to the smallest value (turned to the left)
- Set Vdc to minimum value
- Install soil moisture sensor in the irrigated area, but not so that it is directly irrigated.
- Now it gets difficult: you have to find the right value.
- Water the area. Now if the area is wet, turn VDC until the LED turns on.
- Now it has to get dry again. If the LED is still on, then turn the VDC very slightly until the LED goes out again.
- Then water the area again. If the LED now lights up, then everything is set correctly. Otherwise repeat 5-7.
Unfortunately, I have to admit that the threshold switch is not the optimal solution because it has a range of 0-10V, while the soil moisture sensor has 0-3V. Truebner is already working on a solution here
The OpenSprinkler software is also not optimal for a soil moisture sensor. If the sensor gets wet during watering, the watering will be switched off. We recognized this and solved it with software version 2.1.9: There is an adjustable delay value here. The software for this will be released soon. If you want, I can send it to you now, but the APP doesn't show the new parameters, only the web interface (on the PC)
Sensor 2 also works with this version.
Oh yes, recently there was a discussion about how best to connect a sensor. Ray (from OpenSprinkler.com) said that the best thing would be to use SN1 open (dry) and GND-SN1 connected (wet) and NOT GND-SN1 (dry) and VIN-SN1 (wet) as shown in the wiring diagram. Here is the current circuit diagram
OpenSprinkler Humidity Sensor Switch Plan
Am I correct – there are eight “zones” for irrigation (with expansion then even more), but I can connect a maximum of two moisture sensors? Find the error :)
Correct, after all we have a weather service that sets the watering duration depending on temperature, humidity and amount of rain.
Especially for large areas such as lawns or other open spaces, it makes no sense to measure just one point with a moisture sensor.
This may be the case with large open spaces. However, this is important in a greenhouse where plants with very different water requirements are in positions with different exposure to the sun.
Hi,
I have several zones around my house that need to be watered very differently.
Is there a way to use more than 2 humidity sensors and assign the zones to one sensor?
Unfortunately this is not possible. 2 connections for 2 sensors are provided.
This is now possible! With the Analog Sensor Board you have 8 analog connections available.
Would it be possible to use the one from Vegetronix instead of the soil moisture sensor shown?
https://www.vegetronix.com/Products/VH400/
Yes, this would be possible together with the A2D adapter.