
 Shop
Shop Configurator
OpenSprinkler OSPI – Instructions
**NOTE: OSPi does NOT yet work with Raspbian Debian Version 13 “Trixie”, please use Debian Version 12 “Bookworm” **
OpenSprinkler Pi (Ospi) is an expansion card for the Raspberry Pi (RPI 0; 1 RPi Model A + / B +; RPi 2; RPi 3). It allows RPi to directly access and control the solenoid valves. It optionally comes with a gray case or with a set of laser cut acrylic case parts.
- OSPi Manual Firmware 2.2.1(0) DE
- OSPi Manual Firmware 2.2.1(0) EN
- OSPi Manual Firmware 2.2.1(0) FR
- OSPi Manual Firmware 2.2.1(0) IT
- OSPi Manual Firmware 2.2.1(0) GR
- OpenSprinkler PI2
- Laser cut housing assembly instructions (old housing until 9/2022)
- Instructions for installing OpenSprinkler firmware (English)
- This product requires previous experience with RPi and Linux , as you have to install OSPI software on your own. If you are looking for a watering computer that works out of the box, please purchase the fully assembled and checked one OpenSprinkler 3.0/3.2/AC or DC.
- Link to the OSPi 1.6/2.0 case for 3D printing
Connections, sensors, and valves
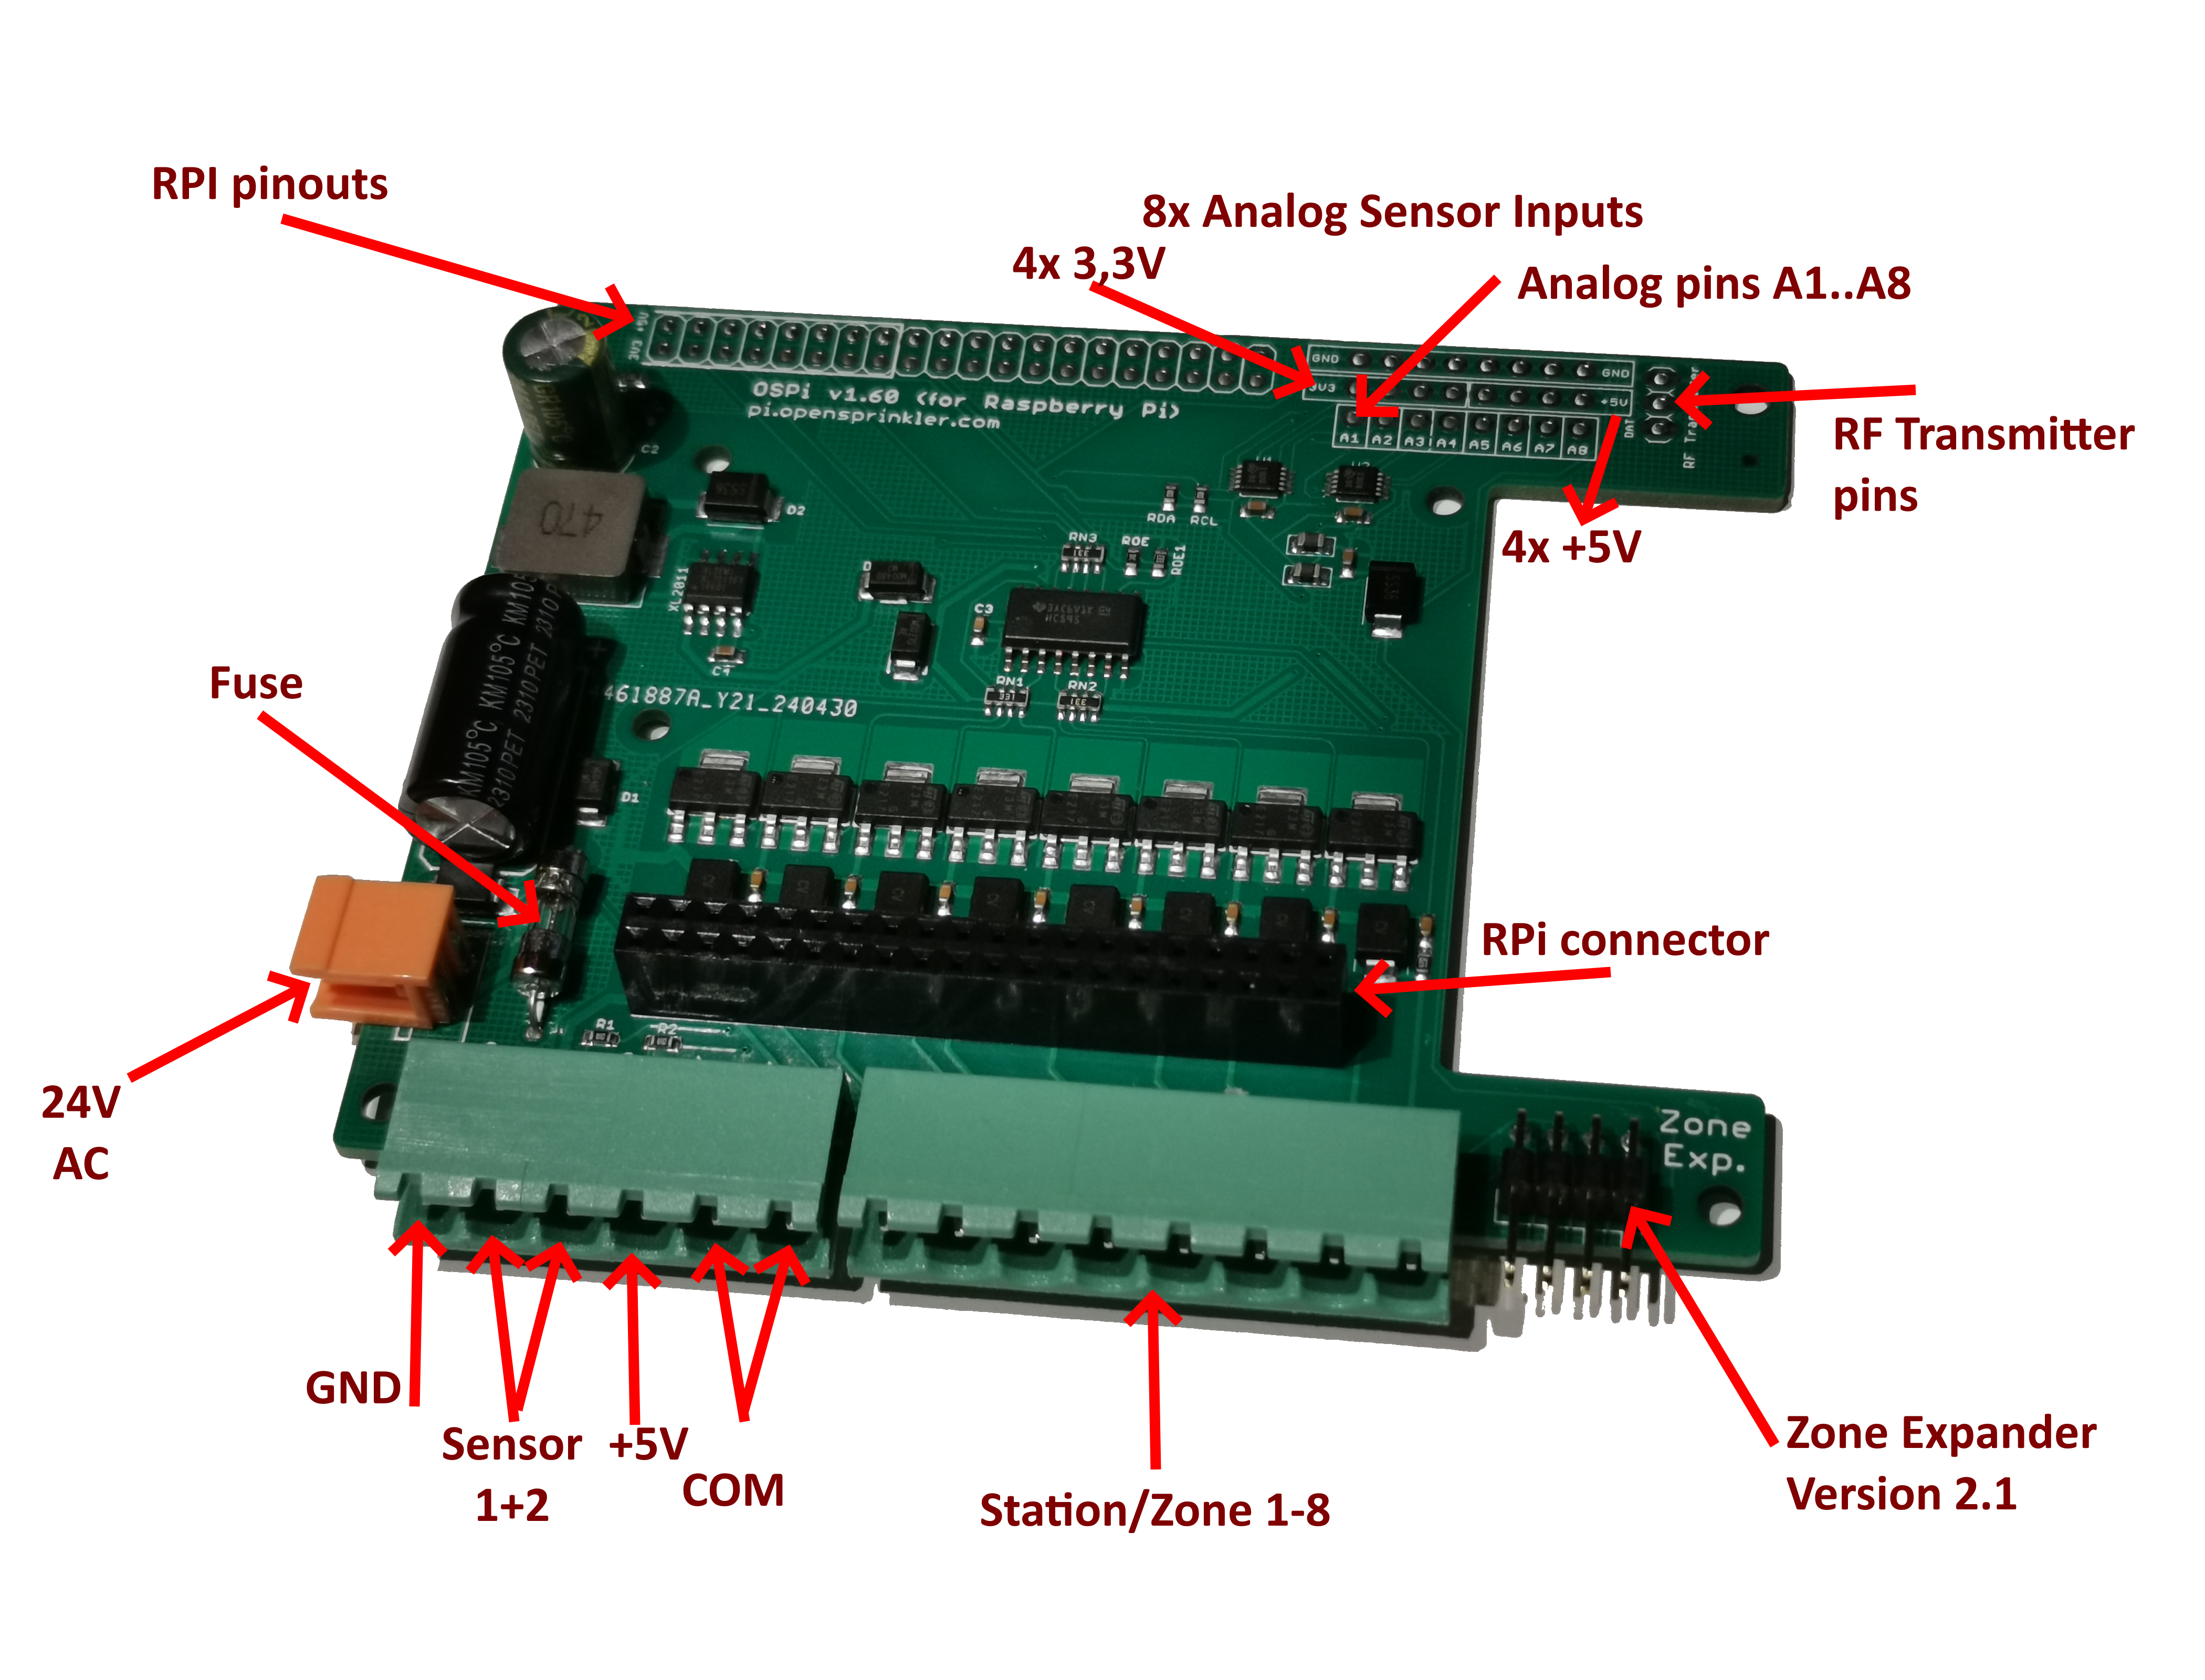
a) OSPI 1.5/1.6
b) OSPi 2.0+
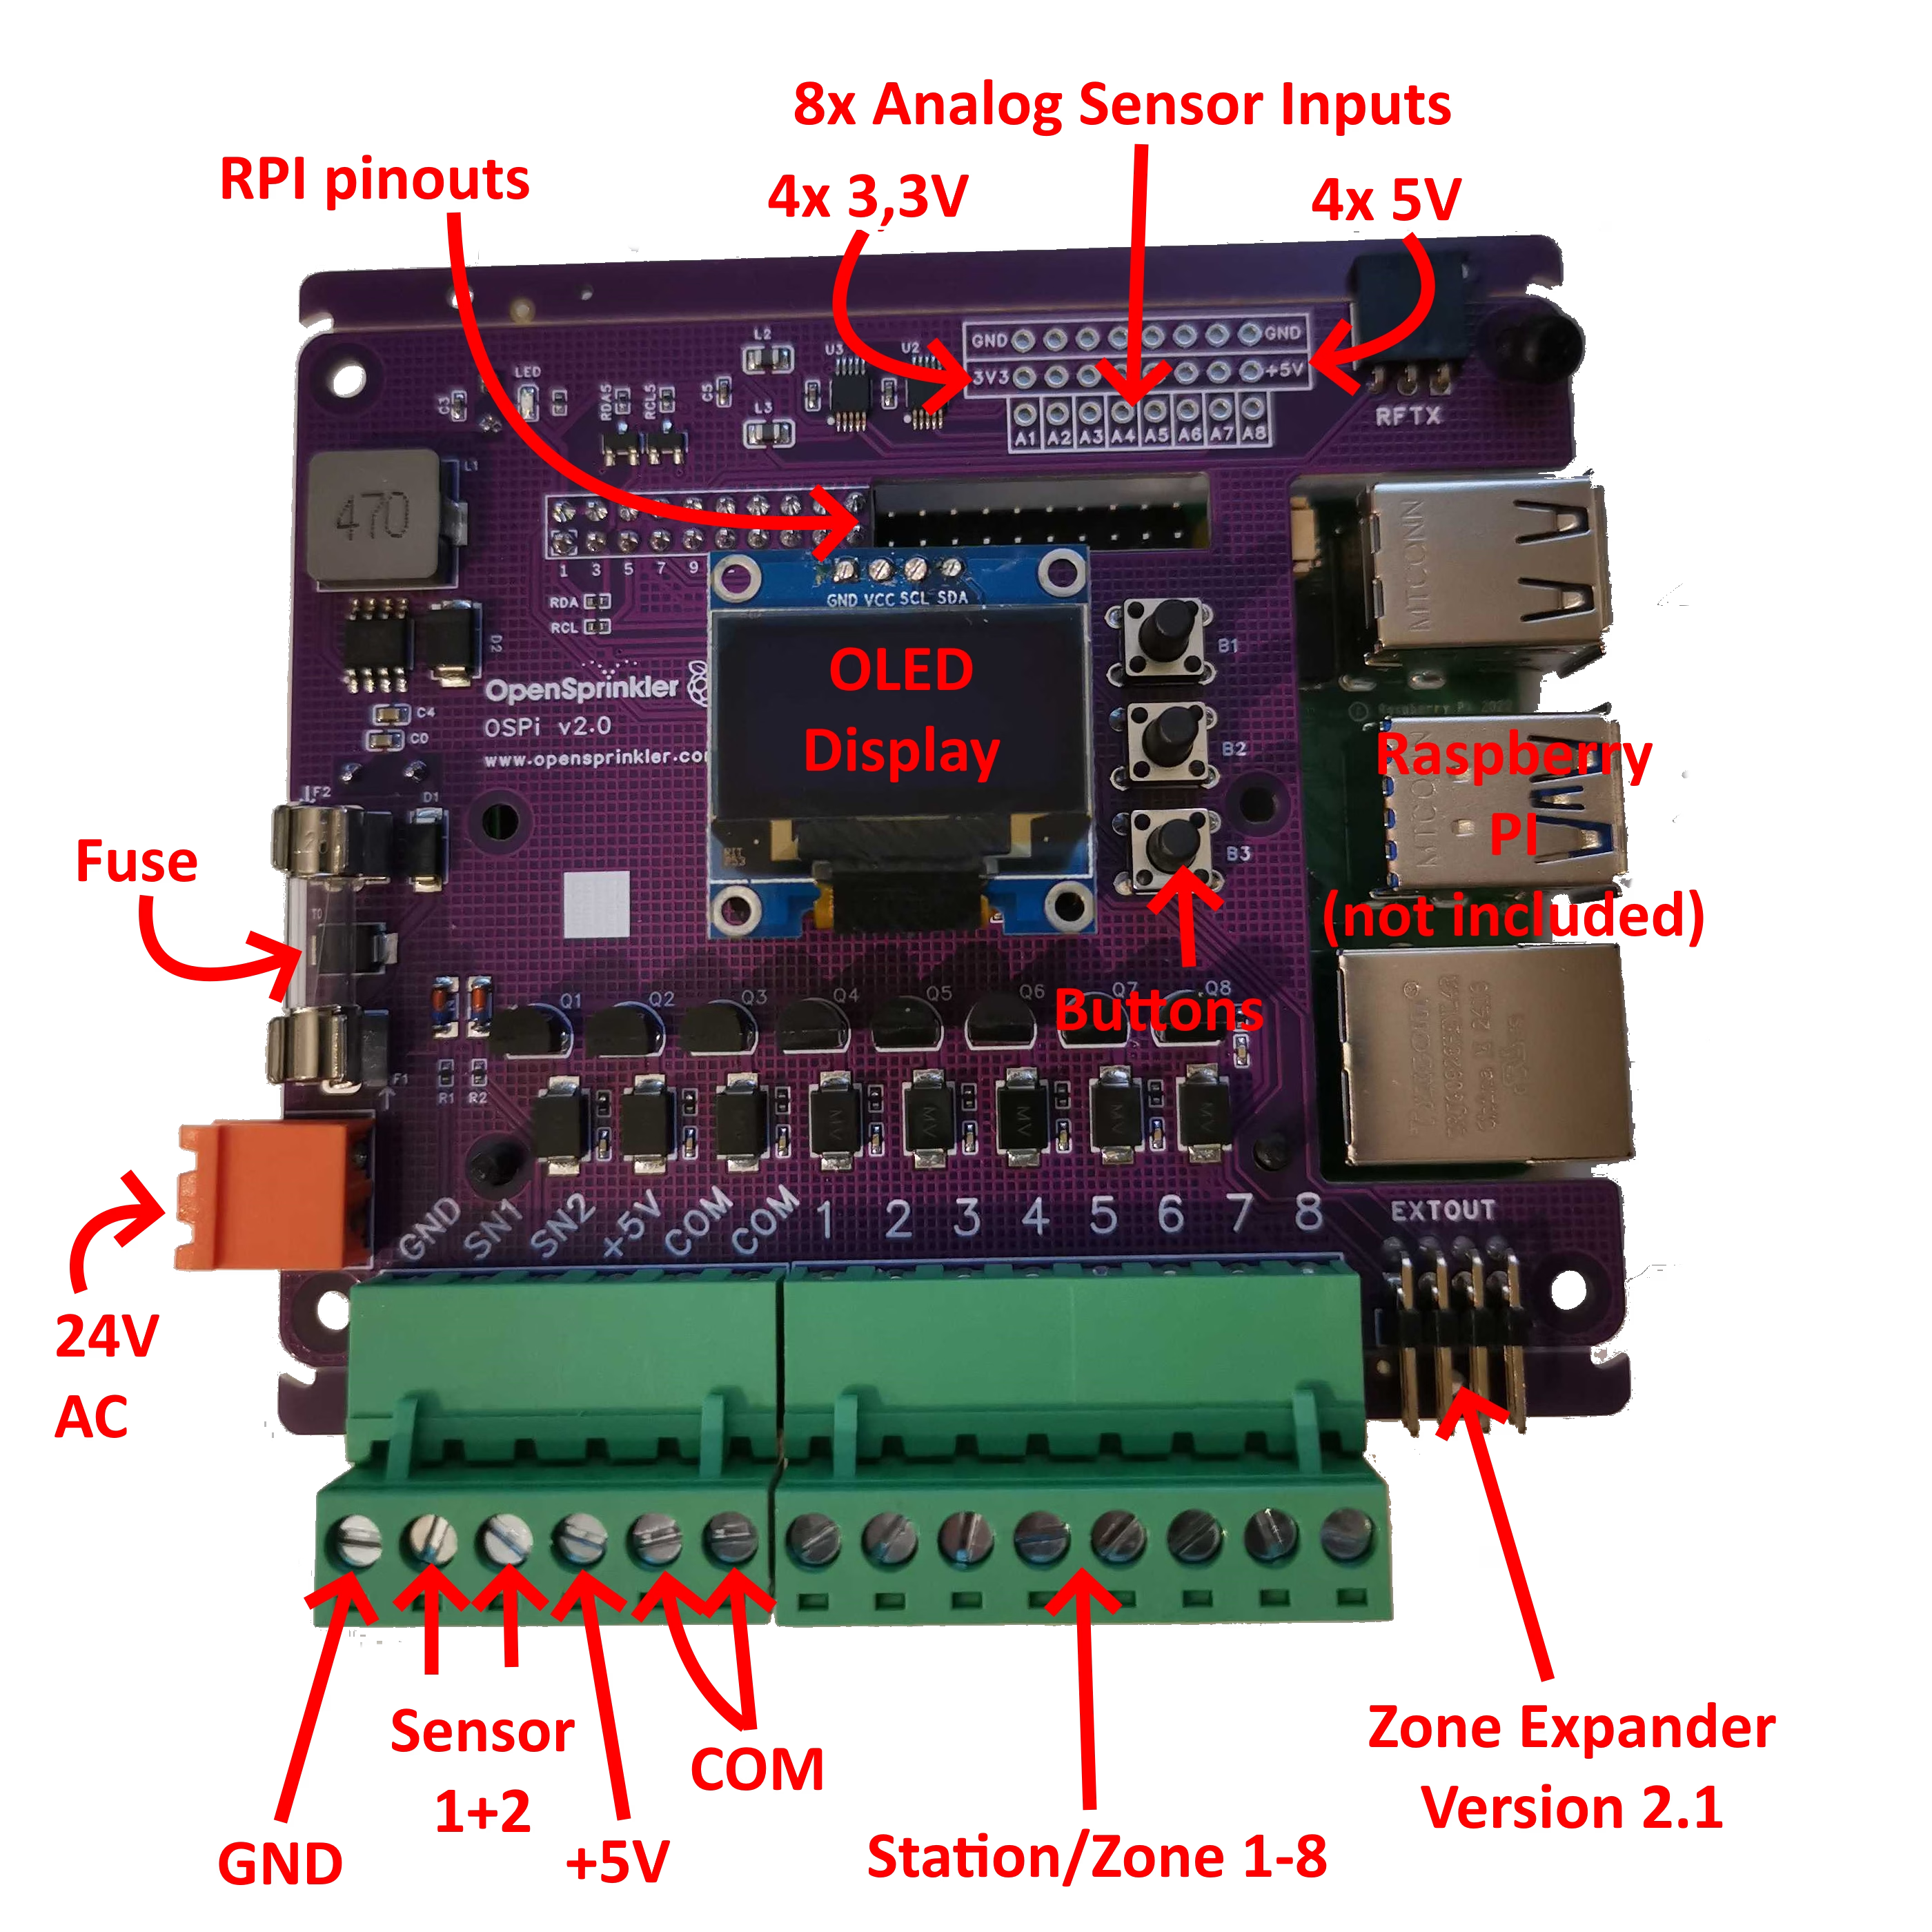
When using analog sensors (e.g., the SMT50), you should install pin headers for the analog interfaces (soldering). Then use the OpenSprinklerShop software.
Digital sensors (e.g., the Hunter Rain-Clik) can be connected directly: SN1 or SN2, and GND
Always connect the solenoid valves to COM and the respective station connection
When using more than 8 stations, you should connect both COM connections together.
Notes:
- Always use a 24AC (alternating current) power supply! Never use a DC and definitely not a power supply with a different voltage! e.g., our Standard power supply or a DIN rail power supply.
- If you want to measure the voltage at the station/zone connections, only do so with the solenoid valve connected; otherwise, you will always measure 24VAC, even if the zone is off.
- DO NOT perform current measurements!
- Only use 24VAC solenoid valves with the OSPi.
Software installation:
**NOTE: OSPi does NOT yet work with Raspbian Debian Version 13 “Trixie”, please use Debian Version 12 “Bookworm” **
Activate via
sudo raspi-configthe I2C bus (3 Interface Options – I4 I2C). Then from the command line:
sudo apt-get install build-essential sudo apt-get install -y libi2c-dev sudo apt-get install -y libgpiod-dev cd ~ git clone https://github.com/OpenSprinkler/OpenSprinkler-Firmware.git cd OpenSprinkler-Firmware sudo ./updater.shsudo apt-get install build-essential sudo apt-get install -y libi2c-dev sudo apt-get install -y libgpiod-dev cd ~ git clone https://github.com/OpenSprinklerShop/OpenSprinkler-Firmware.gitcd OpenSprinkler-Firmware git fetch --tags git checkout "$(git describe --tags "$(git rev-list --tags --max-count=1)")" sudo ./updater.sh
https://openthings.freshdesk.com/support/solutions/articles/5000631599-installing-and-updating-the-unified-firmware-on-ospi